Wow
Did you make it past that title?
Lol
This is my very first tutorial
so please be patient with me
I may be long winded in some
places and not say enough in others.
So..Here it goes
Vintage Dictionary Pages
Glue Book Journal
These are made from a 1906
Teacher Student Reference Set
The books are hand tied so they came
apart quite easily.
But the paper is beautiful.
My motivation for these
books comes from camping
and being outdoors.
I love to write and sketch
and these are designed
to take with me as I wander.
So..Here we go
First Start with a section of book
Like this
Your book may have
more images than the ones
I have been working with.. If they don't
no worries..You can slip images in
as you go to create a theme if you
want.
Here is a picture of the section open
On the left is a map of London
Cool
That will be the theme for this section
Travel..transportation...I found a neat bike and
the description on another page
So I crop it from the page it came from
since it was a loose page.
Save your bits and pieces of cropped paper
because you will want to use them to layer
onto the pagers later on.

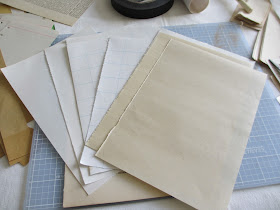
Above is an assortment of vintage
papers cut and ready to use.
I like to use many different kinds..The first layer
is often transparent so that I can still see the
words and images underneath.
I use Liqutex Mate Gel..
Coat the back side of your paper and apply
to dictionary page. It helps make your pages
good and ridged also.
Can you see how I have added different papers
shapes..sizes..Layering them up.
The bike has ended up on another page...
Each little section of paper..perfect size for a poem
or sketch of a leaf or sky.
When you are done adding all the pages
you want..It is time to finish the book
so you can use it.
For this book I used black artists tape. It holds very well
I have also used the Tim Holtz tissue tapes and Washi Tape
All are wonderful and fun to play with.
Cut a piece as long as your page. Position so that half is on one
page and half on the other. Smooth down
Fold your page over and continue until you are done
with all the pages.
You should have something like this
in the picture above.
I used a piece of music book paper cover for the
outside edge..
Above are three more pages from another
book Named
"Summer Scientific Exploration"
It is filled with places to
record what the moon looks like
how big bugs are...
What we find on our walks...
Fun stuff.
I hope you enjoyed this tutorial
Making vintage paper books has become
one of my new favorite things to do
It has been fun sharing with you.
Please leave me a comment or two
I would love to have some feedback on
what you all think.
Also...If you are looking for vintage paper
to play with come by my store
I have just started adding some vintage
blank paper sets.
Thanks so much!!


No comments:
Post a Comment